Essential Guide: How to Service a Hot Water Heater for Optimal Performance

Taking care of your hot water heater might not be the most exciting task, but it’s one of those things that can save you a lot of trouble down the road. Whether you’ve got a tank or tankless system, regular maintenance keeps it running smoothly, helps you avoid costly repairs, and even extends its life. This guide will walk you through how to service a hot water heater step by step, with simple tips anyone can follow.

Key Takeaways

  • Regular maintenance prevents breakdowns and extends the lifespan of your water heater.
  • Always turn off power and water supply before starting any maintenance to ensure safety.
  • Flushing the tank periodically removes sediment that can reduce efficiency.
  • Inspecting and replacing the anode rod can prevent rust and corrosion inside the tank.
  • Setting the thermostat to 120°F balances safety, energy efficiency, and performance.

Understanding the Basics of Water Heater Maintenance

Hot water heater in clean, well-lit maintenance environment.

Types of Water Heaters and Their Differences

Water heaters come in a few main types, and knowing which one you have is important for maintenance. Here are the common types:

  • Tank-style water heaters: These store hot water in a large tank and are the most common type.
  • Tankless water heaters: These heat water on demand and don’t use a storage tank.
  • Heat pump water heaters: These use electricity to move heat from the air to heat the water.
  • Solar water heaters: These rely on energy from the sun and are often paired with a backup system.

Each type has unique maintenance needs, so it’s worth checking your unit’s manual for specific instructions.

Why Regular Maintenance Matters

Regular maintenance isn’t just a nice-to-have—it’s a must. A well-maintained water heater lasts longer, runs more efficiently, and is less likely to break down.

Skipping maintenance can lead to:

  • Higher energy bills because the heater works harder.
  • Sediment buildup, which reduces efficiency.
  • Expensive repairs or even a full replacement.

Taking care of your water heater now saves you money and headaches later.

Common Issues to Watch For

It’s smart to keep an eye out for problems so you can fix them early. Here are some common issues:

  1. Leaks: Water pooling around the base of the heater could mean a leak.
  2. Rust or corrosion: Check the tank and pipes for signs of rust.
  3. Strange noises: Rumbling or popping sounds often mean sediment buildup.
  4. Inconsistent water temperature: If the water isn’t staying hot, the thermostat or heating element might be faulty.

Taking a little time to understand your water heater can make a big difference. You’ll catch small problems before they turn into big ones, keeping your home’s hot water flowing smoothly.

Essential Tools and Safety Precautions

Gathering the Right Tools for the Job

Before starting any work on your water heater, make sure you have the right tools. Having everything ready will save you time and keep things running smoothly. Here’s a list of tools you’ll likely need:

  • Garden hose: For draining the tank.
  • Bucket: To catch water or sediment.
  • Screwdriver: Useful for accessing panels or screws.
  • Adjustable wrench and pipe wrench: To tighten or loosen connections.
  • Teflon tape: Helps seal threaded connections to prevent leaks.
  • Safety gloves and goggles: Protects your hands and eyes from hot water or debris.
  • Replacement parts: Such as an anode rod, if necessary.

Having these tools handy ensures you’re prepared for most maintenance tasks.

Safety Measures Before Starting Maintenance

Safety should always come first. Working with water heaters involves electricity, gas, or hot water, all of which can be dangerous if handled improperly. Follow these steps to stay safe:

  1. Turn off the power: For electric heaters, flip the circuit breaker. For gas heaters, turn the gas valve to “pilot” or off.
  2. Shut off the cold water supply: Locate the valve feeding water into the heater and close it.
  3. Let the water cool: Wait a few hours after shutting down the heater to avoid burns.
  4. Wear protective gear: Always use gloves and goggles to stay safe.
  5. Ensure good ventilation: If you’re working on a gas heater, make sure the area is well-ventilated to avoid gas buildup.

How to Shut Off Power and Water Supply

Knowing how to properly shut off your water heater is critical. Here’s a quick guide:

  • For electric heaters: Locate your home’s breaker panel and flip the switch for the water heater.
  • For gas heaters: Turn the gas valve to the “pilot” position or off completely.
  • To shut off water: Find the cold water supply valve above the heater and turn it clockwise until it stops.

Tip: Always double-check that both the power and water are off before beginning any work. This simple step can prevent accidents and damage to your equipment.

Adjusting the Thermostat for Optimal Performance

Recommended Temperature Settings

The ideal temperature setting for most water heaters is 120°F. This is hot enough to meet your household needs while also being safe. Setting your thermostat at 120°F prevents scalding risks and reduces energy use. If your thermostat is set much higher, you could be paying more on your energy bill than necessary.

For every 10°F you lower the temperature, you might save about 3–5% on energy costs. Plus, keeping the temperature in this range helps protect your water heater from unnecessary wear and tear.

How to Adjust the Thermostat Safely

Adjusting the thermostat on your water heater is a simple task, but safety is key. Here’s how you can do it:

  1. Turn off the power. If you have an electric water heater, switch off the breaker at your home’s electrical panel. For gas heaters, turn the gas control knob to "pilot."
  2. Locate the thermostat. On electric models, you’ll usually find it behind a small panel on the side of the heater. Gas models often have a dial near the bottom.
  3. Use a tool if needed. For electric heaters, you’ll likely need a flathead screwdriver to adjust the temperature setting. For gas heaters, simply turn the dial to the desired temperature.
  4. Replace the panel and restore power. Once the adjustment is made, secure the panel back in place and turn the power or gas back on.

Always use caution when working around electricity or gas. If you’re unsure, it’s better to call a professional.

Benefits of Proper Temperature Control

Keeping your water heater at the right temperature has multiple benefits:

  • Energy savings: Lower temperatures mean less energy used, which saves you money.
  • Safety: Reduces the risk of burns from overly hot water.
  • Longer lifespan: A properly adjusted thermostat puts less strain on the heater, helping it last longer.

By taking a few minutes to check and adjust your thermostat, you can keep your water heater running efficiently and safely for years to come.

Inspecting Your Water Heater for Potential Issues

Checking for Leaks and Corrosion

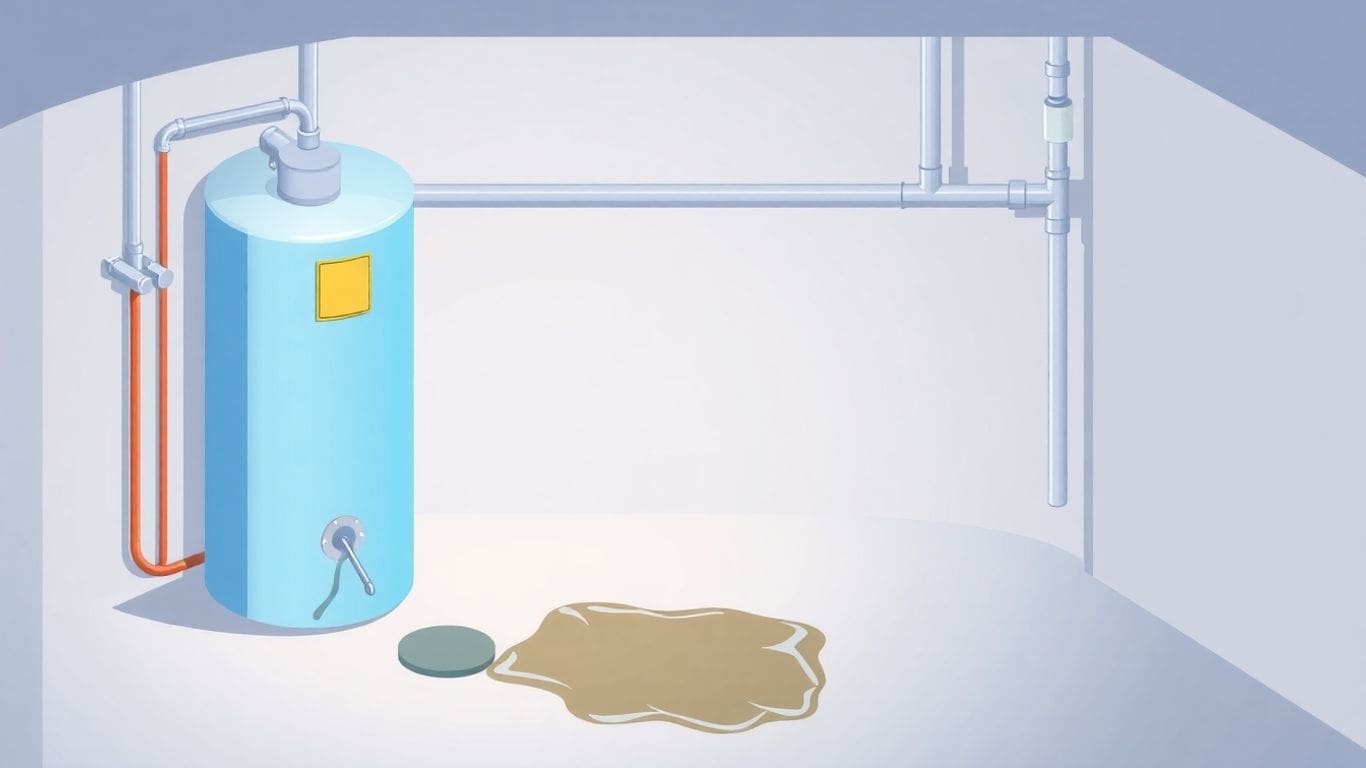
Leaks and corrosion are among the most common issues with water heaters. Start by inspecting the area around the base of the heater. Look for puddles or damp spots. Even small leaks can lead to bigger problems if ignored. Also, check the exterior of the tank for rust or discoloration. Rusty spots could mean the tank is corroding from the inside out, which might require replacement.

Testing the Pressure Relief Valve

The pressure relief valve (or TPR valve) is a safety feature that prevents the tank from over-pressurizing. To test it, place a bucket under the valve’s discharge pipe. Lift the valve’s lever gently. You should hear a slight hiss and see water flow into the bucket. If nothing happens or the valve won’t close properly, it’s time to replace it.

Signs of Wear and Tear to Address

Here are some signs your water heater might need attention:

  • Unusual noises: Rumbling or popping sounds often mean sediment has built up in the tank.
  • Inconsistent water temperature: This might indicate issues with the heating element or thermostat.
  • Reduced hot water supply: If your showers are getting shorter, your heater may not be working efficiently.

Regular inspections can catch small problems before they turn into costly repairs. It’s worth taking the time to check your water heater every few months.

Flushing the Tank to Remove Sediment

Why Sediment Buildup is a Problem

Over time, minerals and debris from your water supply settle at the bottom of your water heater tank. This sediment reduces efficiency by making your heater work harder to heat water. It can even lead to leaks or damage to the tank. Flushing your tank regularly helps keep it running smoothly and extends its lifespan.

Step-by-Step Guide to Flushing the Tank

Flushing your water heater is a simple process if you follow these steps:

  1. Turn off the power or gas supply. For electric heaters, switch off the breaker. For gas heaters, set the thermostat to "pilot" or turn off the gas valve.
  2. Shut off the water supply. Locate the cold water valve and close it to stop water from entering the tank.
  3. Connect a hose to the drain valve. Attach a garden hose to the valve at the bottom of the tank and direct it to a safe drainage area, like a floor drain or outdoors.
  4. Open the pressure relief valve. This allows air to flow into the tank, helping the water drain faster.
  5. Drain the tank. Open the drain valve and let the water flow out. Be careful—it might still be hot.
  6. Flush the tank. Once the tank is empty, turn the cold water supply back on for a few minutes to stir up any leftover sediment. Let the water flow out until it runs clear.
  7. Close the valves and reconnect. Shut the drain valve, remove the hose, and close the pressure relief valve. Then, reopen the cold water supply and turn the power or gas back on.

How Often to Perform This Task

You should flush your water heater at least once a year. If you live in an area with hard water, you might need to do this every six months. Regular flushing keeps your heater efficient and prevents costly repairs.

Pro Tip: Flushing your tank not only saves energy but also helps avoid unexpected breakdowns. Make it part of your home maintenance routine!

Maintaining the Anode Rod for Longevity

What is an Anode Rod and Its Purpose

The anode rod is a small, but crucial, part of your water heater. Its main job is to protect the tank from rust. It does this by acting as a "sacrificial" metal, meaning it corrodes so your tank doesn’t. Without a functioning anode rod, your water heater’s lifespan could shorten significantly.

How to Inspect and Replace the Anode Rod

Inspecting the anode rod isn’t hard, but it does take some care. Here’s how you can do it:

  1. Turn off the water heater. For electric heaters, switch off the power at the breaker. For gas heaters, turn the gas valve to "off."
  2. Shut off the water supply. Locate the cold water inlet valve and close it.
  3. Release pressure. Open a hot water tap or use the pressure relief valve to let out any built-up pressure.
  4. Locate and remove the rod. The anode rod is usually at the top of the tank. Use a wrench to unscrew it.
  5. Examine the rod. If it’s heavily corroded or less than ½ inch thick, it’s time to replace it.
  6. Install a new rod. Screw in the replacement rod and tighten it securely.

Tip: Use a flexible anode rod if you have limited space above your water heater.

Signs Your Anode Rod Needs Attention

Keep an eye out for these signs that your anode rod might need replacing:

  • Water has a metallic or "off" taste.
  • Rust-colored water coming from your taps.
  • The rod looks thin or pitted when inspected.

Regularly checking the anode rod can save you from costly repairs and extend the life of your water heater. It’s a quick task that pays off in the long run.

Descaling a Tankless Water Heater

Understanding Scale Buildup in Tankless Systems

Over time, minerals like calcium and lime can collect inside your tankless water heater. This is especially common if you live in an area with hard water. These minerals create scale buildup, which can clog the system and make it less efficient. If left untreated, it might even damage the heater’s internal components. Regular descaling is key to keeping your heater running smoothly.


If your water heater is taking longer to heat water or making unusual noises, it might be time to descale it.

How to Perform a Descaling Procedure

Descaling your tankless water heater isn’t too hard if you follow these steps:

  1. Turn off the power and water supply. This ensures safety while you work.
  2. Disconnect the water lines. Attach hoses to the inlet and outlet valves.
  3. Use a descaling solution. Mix a descaling solution or a vinegar-water mix in a bucket.
  4. Pump the solution through the heater. Use a small pump to circulate the solution through the system for about 45 minutes.
  5. Flush with clean water. After descaling, rinse the system thoroughly to remove any leftover solution.
  6. Reconnect and test. Reattach the water lines, turn the power back on, and check if the heater works properly.

Preventing Future Scale Accumulation

To reduce scale buildup in the future, try these tips:

  • Install a water softener. This can remove minerals from your water before they reach the heater.
  • Flush the system annually. Regular maintenance helps prevent clogs and keeps your heater efficient.
  • Use a pre-filter. A pre-filter can trap debris and reduce the amount of scale-forming minerals entering the heater.

By staying on top of descaling and maintenance, you’ll extend the lifespan of your tankless water heater and keep it working like new.

Testing and Replacing the TPR Valve

What is a TPR Valve and Why It’s Important

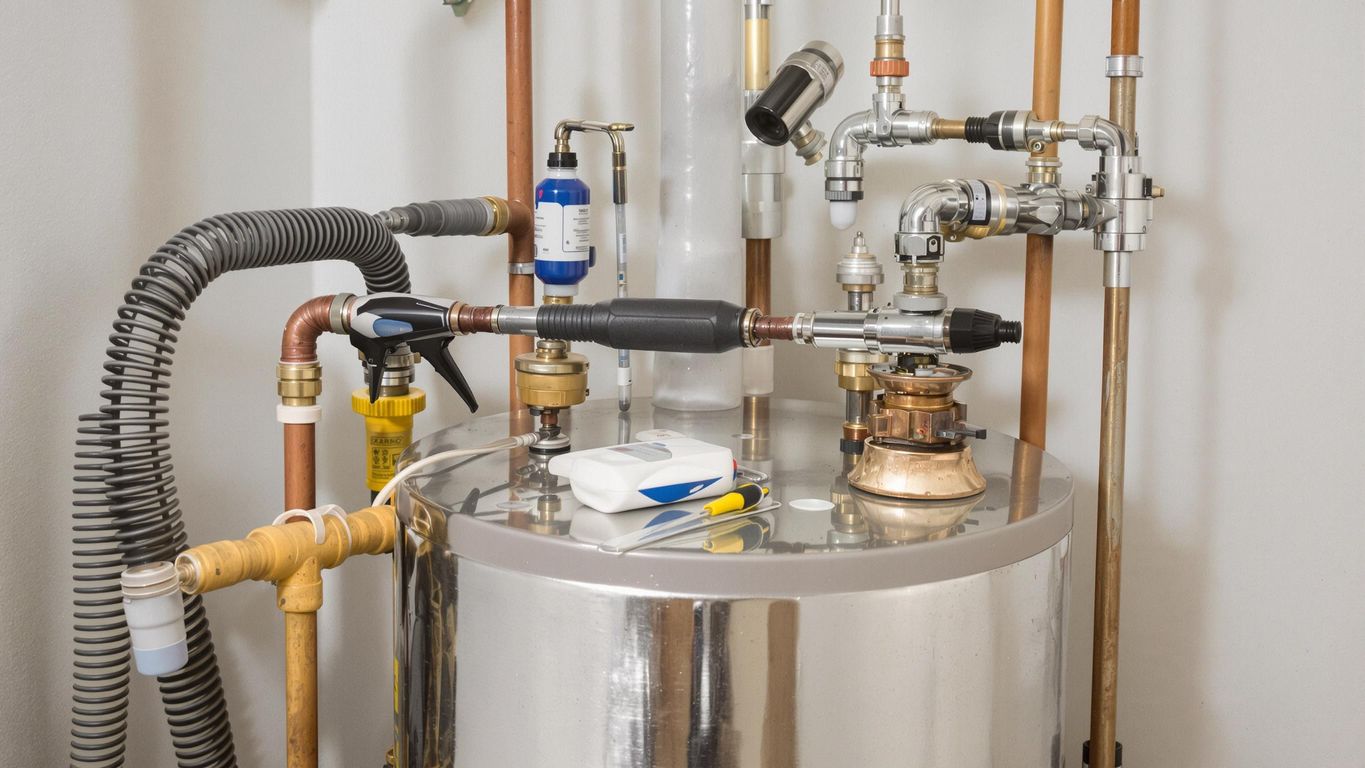
The Temperature and Pressure Relief (TPR) valve is a safety device on your water heater. Its job is to release water if the tank gets too hot or the pressure inside becomes too high. Without it, your tank could overheat or even burst. Checking this valve regularly is critical for your safety.

How to Test the TPR Valve Safely

Testing your TPR valve is simple but requires care. Follow these steps:

  1. Place a bucket under the discharge pipe connected to the valve. This will catch any water that comes out.
  2. Carefully lift the valve’s lever to let some water flow out. Be cautious—this water can be very hot.
  3. Let go of the lever to stop the flow.

What to look for:

  • If water flows out and stops when you release the lever, the valve is working properly.
  • If no water comes out or it keeps flowing after you let go, the valve needs replacing.

Always wear gloves and take your time when testing to avoid burns or spills.

When and How to Replace a Faulty Valve

If your TPR valve isn’t working, it’s time for a replacement. Here’s how to do it:

  1. Turn off the power to your water heater. For electric models, switch off the breaker. For gas models, set the thermostat to "Pilot."
  2. Shut off the cold water supply to the tank.
  3. Drain some water from the tank to reduce pressure. Attach a hose to the drain valve and direct it to a safe area.
  4. Use a wrench to unscrew the old TPR valve.
  5. Wrap the threads of the new valve with plumber’s tape and screw it in tightly.
  6. Turn the water supply and power back on, and check for leaks.

When to Call a Professional

Sometimes, replacing a TPR valve can feel overwhelming. If you’re unsure or uncomfortable, don’t hesitate to call a technician. They can ensure the job is done right and safely. Plus, they can check for other issues, like corrosion or hidden leaks, that might need attention.

If your water heater is older or showing signs of serious wear, it may be time to consider upgrading to a new, energy-efficient model. Newer models not only work better but can also save you money on energy bills.

Energy Efficiency Tips for Your Water Heater

A clean and efficient hot water heater setup.

Insulating Your Water Heater and Pipes

Adding insulation to your water heater and pipes can save energy and cut costs. Here’s how you can do it:

  • Insulating the Heater Tank: Wrap your water heater with an insulation blanket. This helps prevent heat from escaping, especially if your heater is in a cold area like a garage or basement.
  • Insulating Hot Water Pipes: Use foam pipe insulation to cover the hot water pipes. This keeps the water hotter as it travels to your faucets, reducing the need to reheat it.
  • Choose the Right Materials: For pipes close to gas water heaters, use heat-resistant materials like fiberglass instead of foam.

Upgrading to Energy-Efficient Models

If your water heater is over 15 years old, it might be time for an upgrade. Modern models, like Energy Star certified heaters, use less energy and heat water faster. Tankless and solar-powered options are also worth considering for long-term savings.

Pro Tip: Upgrading your water heater can improve your home’s comfort and lower energy bills. Look for local incentives to help offset the cost.

Reducing Standby Heat Loss

Standby heat loss happens when your water heater keeps reheating water you’re not using. Here’s how to minimize it:

  1. Lower the thermostat to 120°F. This temperature is safe, energy-efficient, and prevents scalding.
  2. Turn off the heater or set it to its lowest setting if you’ll be away for more than a few days.
  3. Install a timer on your water heater to control when it heats water, especially if you have a predictable daily schedule.

Quick Tip: Every 10°F you lower the temperature can save you about 5% on energy costs.

Making these small changes can lead to big savings over time. Plus, you’ll be helping the environment by using less energy!

When to Call a Professional for Help

Recognizing Problems Beyond DIY Maintenance

Sometimes, even with your best efforts, things can go wrong. If your water heater is leaking, making strange noises, or not heating water at all, it’s time to call a professional. These issues often point to deeper problems that need expert knowledge to fix. For instance, a leak might mean the tank is corroding from the inside, which isn’t something you can easily repair yourself.

Other signs to watch for include:

  • Water that’s rusty or discolored
  • A sudden spike in your energy bills
  • The smell of gas near your water heater (for gas-powered models)

How to Choose a Qualified Technician

Finding the right person for the job can feel overwhelming, but it doesn’t have to be. Look for a licensed plumber or technician with experience in water heater repairs. Ask for references or reviews to make sure they’re reliable. You can also check if they offer guarantees on their work, which shows they stand by their service.

Here are a few tips to help you choose:

  1. Verify their license and insurance.
  2. Ask about their experience with your specific type of water heater.
  3. Get a written estimate before agreeing to any repairs.

Costs to Expect for Professional Services

The cost of hiring a professional varies depending on the problem. Here’s a quick breakdown of typical expenses:

Service Type Estimated Cost Range
Basic inspection $50 – $100
Replacing a thermostat $150 – $300
Fixing a leak $200 – $500
Full water heater replacement $800 – $3,000

Keep in mind, regular maintenance by a pro can save you money in the long run by preventing major issues.

If you’re unsure, it’s always better to be safe than sorry. A professional can not only fix the problem but also ensure your water heater is running efficiently and safely.

Extending the Lifespan of Your Water Heater

Creating a Regular Maintenance Schedule

To keep your water heater running for years, set up a simple maintenance schedule. Regular tasks like flushing the tank and checking for leaks can make a big difference. Aim to inspect your heater every three to six months. A little effort now can save you from costly repairs later.

Here’s a quick checklist to get you started:

  • Flush the tank yearly to remove sediment.
  • Test the pressure relief valve every six months.
  • Inspect the anode rod every 1-2 years for wear.
  • Check for rust or corrosion on the tank.

Avoiding Common Mistakes

Some mistakes can shorten your water heater’s life. For example:

  1. Ignoring small leaks – they can grow into major problems.
  2. Setting the thermostat too high – it wastes energy and stresses the system.
  3. Forgetting to flush the tank – sediment buildup can damage the heater.

Take simple steps to avoid these issues, and your heater will thank you.

Tips for Long-Term Care

For long-term care, think beyond just maintenance. Keep the area around your heater clean and free of clutter. If you have hard water, consider installing a water softener to reduce mineral buildup. Schedule a professional inspection once a year, especially for gas heaters.

A well-maintained water heater can last 10-15 years, or even longer for tankless models. Treat it like an investment, and it will pay off with reliable hot water and fewer headaches.

If your heater is over 10 years old or showing signs of wear, it might be time to think about upgrading to an energy-efficient model. Newer models can save you money on energy bills and provide better performance.

Upgrading or Replacing Your Water Heater

Signs It’s Time for a Replacement

Knowing when to replace your water heater can save you money and headaches. Here are some signs that it’s time for a new unit:

  • Your heater is over 10-15 years old.
  • Repairs cost more than half the price of a new water heater.
  • You keep running out of hot water, even after maintenance.
  • There’s rust or corrosion on the tank.
  • The unit is less efficient, causing higher energy bills.

If you spot these issues, it’s probably time to upgrade. A new water heater can improve efficiency and ensure reliable hot water for your home.

Choosing the Right Water Heater for Your Needs

When replacing your water heater, picking the right type is key. Here are some common options:

Type Features Best For
Tank Water Heater Stores hot water; lower upfront cost Small households
Tankless Heats water on demand; saves energy Larger families
Heat Pump Uses electricity efficiently Eco-conscious homes
Solar Uses sunlight; high upfront cost, low bills Sunny climates

Think about your household size, budget, and energy goals before deciding.

Upgrading to an energy-efficient model could lower your utility bills and provide more consistent hot water.

Steps to Safely Remove and Install a New Unit

Replacing a water heater isn’t too complicated, but safety matters. Follow these steps:

  1. Turn off the power or gas supply.
  2. Shut off the water supply and drain the tank.
  3. Disconnect the old unit from its pipes and power source.
  4. Position the new water heater and connect it to the plumbing and power.
  5. Fill the tank with water and check for leaks.
  6. Turn the power or gas back on and test the unit.

Tip: If you’re unsure about any step, consider hiring a professional. Heating Geek offers expert advice and services to help with water heater replacement.

Frequently Asked Questions

How often should I flush my water heater?

You should flush your water heater once a year to remove sediment buildup. This helps maintain efficiency and extend the lifespan of the unit.

What is the ideal temperature setting for a water heater?

The recommended temperature is 120°F. This setting provides hot water, reduces the risk of scalding, and saves energy.

How do I know if my anode rod needs replacing?

Inspect the anode rod every 2-3 years. If it’s heavily corroded or less than half an inch thick, it’s time to replace it.

What is a TPR valve, and why is it important?

The Temperature and Pressure Relief (TPR) valve prevents the tank from overheating or building up too much pressure. It’s a critical safety feature.

Can I perform water heater maintenance myself?

Yes, basic tasks like flushing the tank or adjusting the thermostat can be done yourself. However, for complex issues, it’s best to call a professional.

How can I tell if my water heater is leaking?

Look for water pooling around the base of the unit or dripping from connections. Rusty water or a drop in water pressure can also indicate a leak.

What are the signs that my water heater needs replacement?

If your water heater is over 10-15 years old, provides inconsistent hot water, or has visible corrosion, it might be time for a replacement.

Do tankless water heaters need maintenance?

Yes, tankless water heaters require descaling every 1-2 years to prevent mineral buildup and ensure efficient operation.

Mike Sullivan

Water Heater Writer
Mike is an authority on water heating systems, combining decades of hands-on experience with a passion for making technical knowledge accessible to everyone. Through his writing and consulting work, he helps homeowners and professionals navigate the complexities of water heater selection, installation, and maintenance, with a particular focus on energy-efficient solutions.

    Table Of Contents

    More Posts

    Stay informed and prepared with our expert insights. Discover the latest trends, tips, and technologies in water and flood damage restoration to protect your property and peace of mind.

    Flood Your Business with Leads

    Business Owners: Join our insider newsletter for exclusive marketing strategies and growth opportunities for local services business.
    Heating Geek logo white
    Heating Geek is a water heater repair referral company. We connect you with a professional in your area. All services are operated independently of Heating Geek and it is the responsibility of each user to verify that the company they're connected with meets all licensing and insurance requirements in that jurisdiction.

    The photos on Heating Geek are for illustrative purposes only and do not represent the services in your area. The content has not been fully fact-checked and may contain errors.

    Services will not be available in all areas, and when services are available, they may vary depending on the providers available.

    Contact info

    Copyright © 
    2025
     Heating Geek. All Rights Reserved.