A Complete Guide on How to Repair a Water Heater Yourself
Water heaters are essential for our daily routines, providing hot water for showers, cleaning, and cooking. When they start acting…

Replacing a water heater might seem intimidating, but with the right guidance, you can tackle it like a pro. Whether your old heater has given up or you just want to upgrade, this step-by-step guide will help you through the entire process. From understanding your options to ensuring everything is set up correctly, we’ve got you covered. Let’s dive in and learn how to replace a water heater without breaking a sweat!
Before you jump into replacing your water heater, it’s a good idea to know what choices you have. Water heaters aren’t all the same, and picking the right one can save you money and trouble later on. Let’s look at the different types, how energy efficient they are, and whether gas or electric is better for you.
There are mainly two kinds of water heaters: tank and tankless. Tank water heaters are the more common type. They heat up water and store it in a tank until you need it. Tankless water heaters, also called on-demand water heaters, heat water only when you turn on a hot water tap. This can save energy because you’re not constantly heating water in a tank.
Water heaters come with energy efficiency ratings to help you understand how much energy they use. Look for the Energy Factor (EF) rating. The higher the EF, the more efficient the water heater is. Energy-efficient models might cost more at first, but they can save you money on your energy bill over time.
Choosing a water heater with a good energy rating is like picking a fuel-efficient car. It might cost a bit more to buy, but you’ll save money on gas in the long run.
Deciding between gas and electric water heaters depends on a few things. Gas water heaters often heat water faster and can be cheaper to run if gas prices are lower than electricity prices in your area. However, they need a gas line connection and proper ventilation. Electric water heaters are easier to install, but electricity can be more expensive than gas in some areas.
Here’s a quick comparison:
| Feature | Gas Water Heater | Electric Water Heater |
|---|---|---|
| Heating Speed | Faster | Slower |
| Energy Cost | Can be cheaper, depends on local prices | Can be more expensive, depends on local prices |
| Installation | More complex, needs gas line and ventilation | Easier, just needs an electrical connection |
| Purchase Price | Varies | Varies |
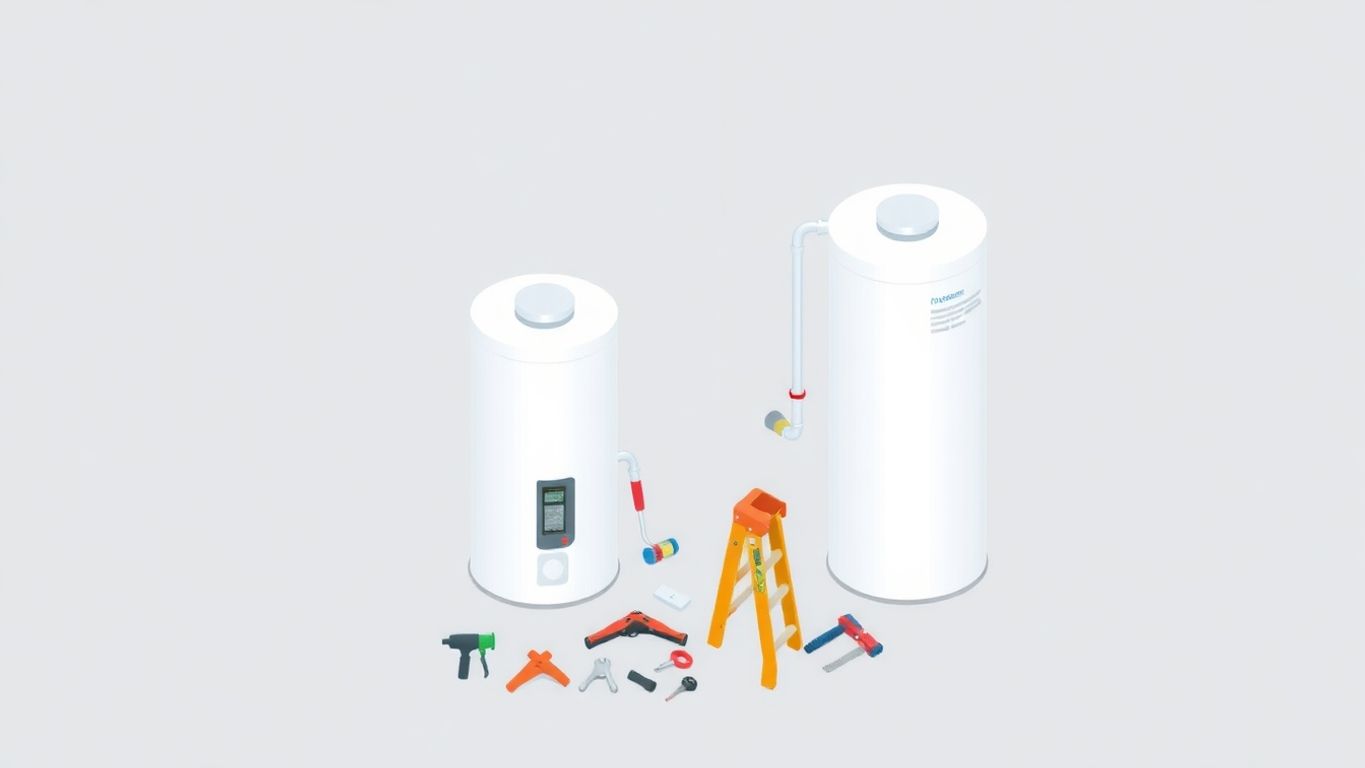
Before you even think about touching that old water heater, you need to get your gear together. Trust me, having everything ready will make the job way easier and safer. It’s like prepping for a big test – you wouldn’t go in without your notes, right?
Okay, let’s talk tools. You’ll need a few basics, and maybe some extras depending on your setup. Don’t skimp here; the right tool makes all the difference. I once tried using pliers instead of a proper wrench and ended up stripping a bolt. Not fun.
Here’s a list to get you started:
Safety first, always! This isn’t a joke. Water heaters are heavy and involve water and electricity (or gas). Protect yourself.
Working with water and gas/electricity can be dangerous. Always turn off the power and water supply before starting any work. If you’re not comfortable with any part of the process, call a professional. It’s better to be safe than sorry.
Besides the tools, you’ll need some materials to actually hook up the new water heater. Make a list and double-check before you start. Running to the hardware store mid-project is a pain.
Having all this stuff ready to go will make the whole process smoother. Trust me, being prepared is half the battle.
Before you even think about touching that old water heater, some prep work is needed. This part is all about safety and making sure you don’t end up with a flooded basement or worse. Let’s get started!
First things first: turn off the water and power. This is super important for your safety.
Now, you need to drain the old water heater. This can be a bit messy, so be prepared.
Draining the tank can take a while, sometimes an hour or more, depending on how full it is and how much sediment is in the bottom. Be patient and let it drain completely. This is a good time to grab a snack or catch up on your favorite show.
Once the water heater is empty, you can disconnect the water lines. Have a bucket and some towels handy because there will still be some water in the pipes.
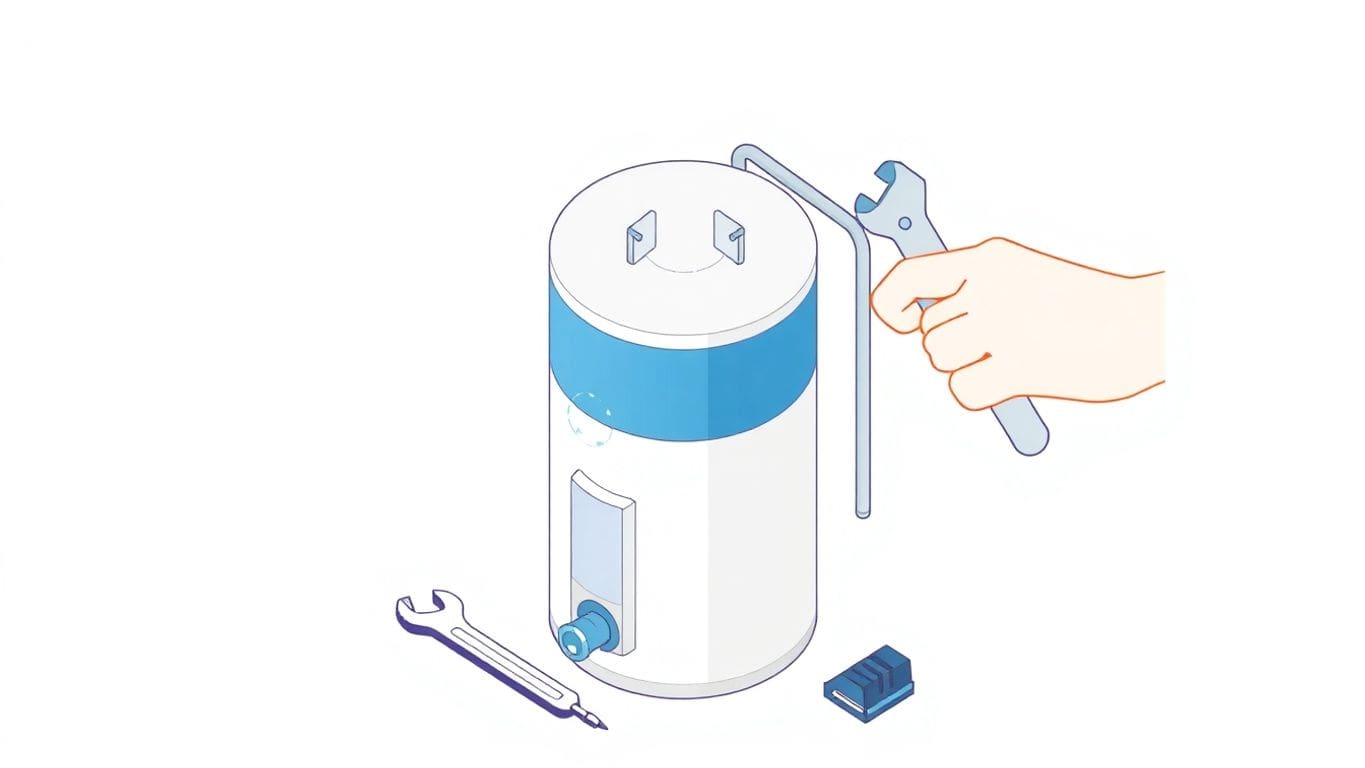
Okay, so you’ve prepped everything, and now it’s time to get that old water heater out of there. This part can be a bit tough because those things are heavy, especially if they’re full of sediment.
Lift with your legs, not your back! Keep your back straight and let your leg muscles do the work. Slowly tilt the water heater onto the dolly, and then carefully wheel it out. Watch out for doorways and tight corners.
Now that you’ve got the old water heater out, you need to get rid of it. Don’t just leave it on the curb!
Disposing of a water heater isn’t as simple as tossing it in the trash. Many components can be recycled, and some areas have regulations about how to handle the materials inside. Always check local guidelines to avoid fines or environmental damage.
Before you put the new water heater in, take a few minutes to clean up the area where the old one was. This is a good chance to get rid of any dust, dirt, or debris that’s been hiding there.
A clean, level space will make the installation process much smoother. Plus, you’ll have a nice, tidy area for your new water heater installation.
Now comes the exciting part: putting in your new water heater! This step needs care, but if you take your time, you’ll be fine. Let’s get started.
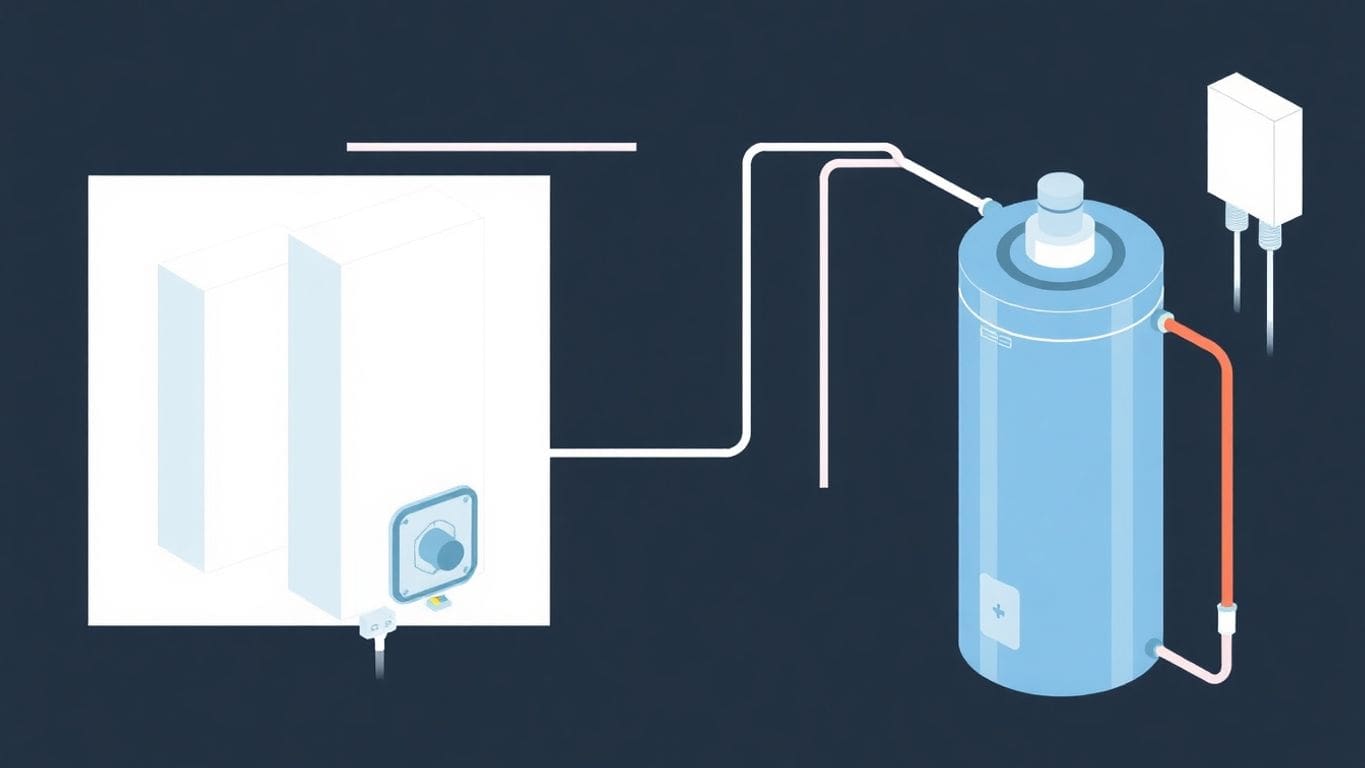
First, get your new water heater into place. Use an appliance dolly to move it; these things are heavy! Make sure you have enough space around the unit. Most electric water heaters with a tank need at least 6 inches of space on all sides for good airflow.
Now, let’s hook up the water lines. This part is important to avoid leaks.
This step depends on whether you have an electric or gas water heater. Safety is key here!
For Electric Water Heaters:
For Gas Water Heaters:
Remember, if you’re not comfortable working with electricity or gas, it’s best to call a professional. It’s better to be safe than sorry.
Okay, you’ve got the new water heater in place. Now comes the important part: making sure it works right! This step is all about checking for problems and ensuring everything is safe and sound. Let’s get to it.
First, take a close look around all the connections you made. Use a flashlight to get a good view. Look for any signs of water leaking from the pipes, fittings, or the tank itself. Even a small drip can turn into a big problem later, so don’t ignore anything. If you see a leak, tighten the connection a little more. If it still leaks, you might need to redo the connection. You can find local repair services if needed.
Once you’re sure there are no leaks, turn on a hot water faucet somewhere in your house. Let the water run for a few minutes. At first, it might sputter a bit as air gets pushed out of the pipes. After a little while, the water should get hot. Use a thermometer to check the water temperature. It should be around 120°F (49°C). This temperature is hot enough for most uses but not so hot that it will scald you. Adjust the thermostat on the water heater if you need to change the temperature.
If you have a gas water heater, it’s super important to make sure it has good ventilation. This means that the exhaust flue (the pipe that carries away the fumes) is properly connected and not blocked. You should also have a carbon monoxide detector near the water heater. Carbon monoxide is a dangerous gas that you can’t see or smell, so a detector is a must. Make sure the area around the water heater is clear of anything that could block airflow. Proper ventilation helps prevent carbon monoxide buildup and keeps your home safe. If you’re not sure about the ventilation, it’s best to call a professional to check it out. You might need expert help to ensure safety.
Testing your new water heater is a critical step. It’s not just about getting hot water; it’s about ensuring your safety and preventing future problems. Take your time, be thorough, and don’t hesitate to call a pro if you’re unsure about anything.
So, you’ve got your new water heater installed. Great! But the job isn’t quite done. To keep it running well for years, you need to set up a good maintenance routine. Think of it like taking care of a car – a little effort now can save you big headaches (and expenses) later.
Checking your water heater regularly is super important. It’s like a quick health check-up for your appliance. Here’s what to look for:
Flushing your water heater tank once a year helps get rid of sediment that builds up inside. Sediment can reduce the heater’s efficiency and even damage it. Here’s how to do it:
Flushing the tank might seem like a pain, but it’s one of the best things you can do to extend the life of your water heater. It prevents sediment buildup, which can cause all sorts of problems.
The anode rod is a metal rod inside the tank that helps prevent corrosion. It’s like a sacrificial lamb, corroding instead of the tank itself. You should check the anode rod every few years and replace it when it’s mostly eaten away. If you don’t, your tank could rust and fail much sooner. Replacing the anode rod is way cheaper than replacing the whole water heater!
| Inspection Frequency | Action | Benefit |
|---|---|---|
| Monthly | Check for leaks | Prevents water damage |
| Annually | Flush the tank | Removes sediment, improves efficiency |
| Every 2-3 years | Inspect the anode rod | Prevents tank corrosion |
It’s super important to know the rules before you start swapping out your water heater. You don’t want to get in trouble with the city or, worse, create a safety hazard. Let’s break down what you need to check.
Before you even think about touching that old water heater, find out if you need a permit. Most places do require one. This is basically a permission slip from your local government to make sure the work is done right. To get a permit, you’ll probably need to submit some paperwork and maybe even have an inspection after the job is done. It might seem like a pain, but it’s there to protect you and your neighbors. Not getting a permit when you need one can lead to fines or having to redo the whole installation. Check with your local building department to see what’s needed in your area.
Plumbing codes are the rules that plumbers have to follow. These codes cover everything from the type of pipes you can use to how the water heater needs to be vented. These rules are in place to make sure your water heater is safe and works well. You can usually find these codes on your city or county website. Some common things covered in plumbing codes include:
If you’re not a plumbing expert, these codes can be confusing. Don’t be afraid to call your local building department and ask them to explain anything you don’t understand.
Safety is the most important thing when dealing with water heaters. You’re working with water, electricity, or gas, and all of those can be dangerous if you’re not careful. Here are some safety standards to keep in mind:
If your local code requires a change from a simple vent to a direct vent, it’s best to call a professional. Direct venting is when a special pipe takes the exhaust gases out of your house and brings fresh air in. This can be tricky to install, and you want to make sure it’s done right.
Also, many communities have specific requirements in their local plumbing codes for residential water heaters. When installing a water heater, make sure it will comply with installation code requirements for your location and type of water heater.
Sometimes, fixing a water heater is best left to the pros. It’s like when I tried fixing my car’s AC last summer – ended up making it worse! Knowing when to call someone can save you time, money, and a lot of stress. Plus, you’ll be sure the job is done right.
Trying to fix a gas leak yourself is a huge risk. It’s always better to be safe and call someone who knows what they’re doing.
I know, calling a plumber can be expensive. But think about the cost of doing it wrong. You could damage your home, hurt yourself, or make the problem worse. Here’s a quick look at some costs:
| Task | Average Cost |
|---|---|
| Simple repair | $150 – $300 |
| Replacing a water heater | $800 – $2000+ |
| Emergency call | $200 – $500+ |
Sometimes, a repair is all you need. Other times, it’s better to replace your water heater. A pro can help you decide what’s best.
Finding the right plumber is key. Here’s how I usually do it:
Don’t just go with the cheapest option. Look for someone with good reviews and a solid reputation. A good plumber will explain the problem clearly and give you a fair price. They’ll also make sure your water heater is installed safely and correctly.
Typically, water heaters last between 10 to 15 years. If yours is getting old, it might be time to think about replacing it.
Yes, if you have basic tools and some handy skills, you can replace a water heater on your own. Just follow the steps carefully.
You’ll need tools like a wrench, screwdriver, and a pipe cutter. Don’t forget to have safety gear like gloves and goggles!
You can choose between gas and electric water heaters. Consider what works best for your home and your budget.
Look for water pooling around the base of the heater or damp spots on the floor. If you notice any, it might be leaking.
You can recycle it or take it to a local disposal site. Some companies may even pick it up for you.
Regularly check for leaks, flush the tank yearly, and replace the anode rod when needed to keep it in good shape.
If you feel unsure about the installation process or notice major issues like leaks, it’s best to call a professional.